Showing posts with label cheese. Show all posts

Thursday, March 24, 2016

Turkey Tetrazzini/Casserole

As a continuation of my quest to find good recipes for leftover turkey, I made this.

Honestly, this was my first experience whatsoever with a "Tetrazzini" -- I just looked up the term, and even though I based this on a recipe called Turkey Tetrazzini, I don't think the name really applies here.

At any rate, this was a winner in our house! I had my doubts at first, but seriously, with pasta and cream of chicken soup, how bad could it really be?! Food snobs, please don't answer that.

Turkey "Tetrazzini" -- or we can just call it a Casserole

8 oz dry pasta of choice -- I used tri-colored rotini & I would do it again!
1 cup broccoli, steamed/boiled until tender but several minutes from mushy (or frozen broccoli, thawed)
1 cup cubed cooked turkey
1, 10.75 oz can cream of chicken soup
1 cup water
1/2 tsp chicken bouillon
1/3 cup chopped celery
1/4 tsp garlic powder
1/3 cup shredded cheese of choice (I used a "fiesta mix" with cheddar, jack, ...? anyway, it worked.)
1/4 cup seasoned bread crumbs
  1. Preheat oven to 350° F.
  2. Cook pasta per package instructions. Drain and place into 9x9 glass baking dish.
  3. Arrange broccoli on top of pasta in baking dish. Add turkey on top of broccoli.
  4. In a medium saucepan, combine cream of chicken soup, water, bouillon (alternately, use chicken broth in place of water & bouillon), celery, and garlic powder. Bring to a boil. Remove from heat and pour as evenly as possible over pasta/broccoli/turkey.
  5. Sprinkle cheese evenly on top. Lastly, sprinkle bread crumbs over the cheese.
  6. Bake for 25 minutes at 350°F. Serve hot with a glass of cold milk!

Monday, November 9, 2015

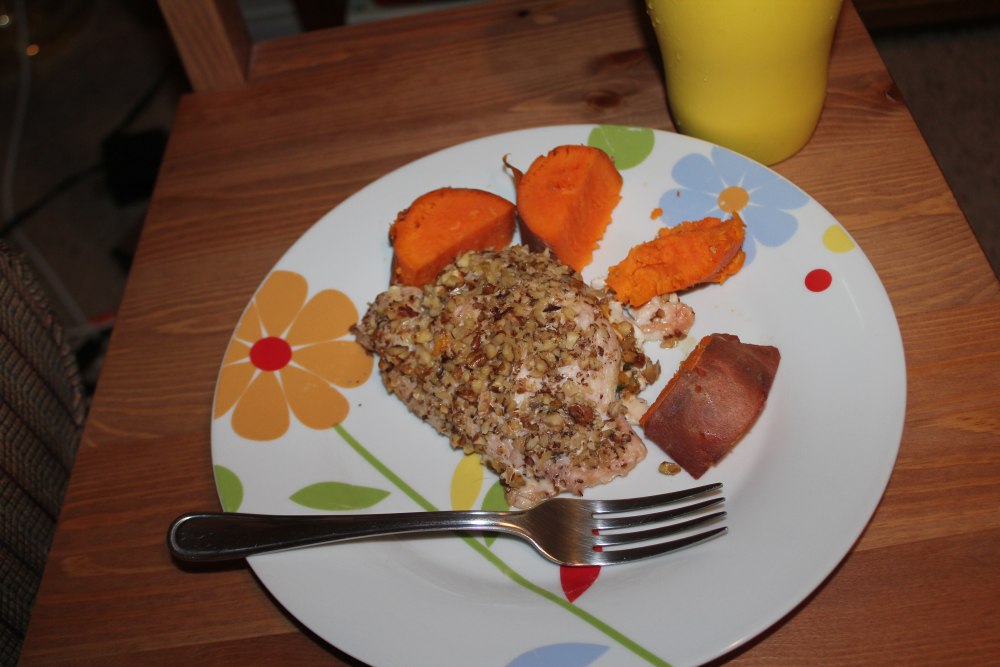
Chicken with Walnuts & Spinach

This is one of my absolute favorite recipes.

I came across it a few years ago and have frequently referred to it on Prevention.com. But recently when I tried to access it, the website had undergone some updates, and the URL I had bookmarked no longer worked. I ultimately found it again, but I decided to save my favorite recipes where I know I can access them!

This recipe is very forgiving. I have had success with dehydrated onion. I typically use frozen spinach. I use whatever cheese I have on hand -- most often cheddar. And the amounts I use vary. I've accidentally burned the walnuts and overcooked the chicken, but surprisingly this gave it a good flavor (and dinner wasn't ruined). It also freezes very well. I could eat it every day for dinner, I think.

Chicken with Walnuts & Spinach
serves 2-4
cooking oil
1/3 c chopped onion (or about 1 Tbsp dehydrated onion)
1 c walnut pieces, chopped (I like to use my food processor)
1 c baby spinach, chopped (frozen spinach works fine & thaws in the skillet)
1/2 c grated provolone (or whatever cheese you like -- I usually use cheddar)
4 thin-sliced boneless, skinless chicken breasts (I just take 2 boneless, skinless chicken breasts and slice them myself!)

  1. Preheat oven to 375°F. 
  2. Heat about 1 Tbsp oil in medium skillet over medium-low heat. Add onion and half of the chopped walnuts and cook a few minutes, stirring often. Add spinach. Cook until wilted (or thawed), about 2 minutes. Remove from heat. Stir in cheese.
  3. Put remaining walnuts in a shallow bowl. 
  4. Spread out chicken on a cutting board or baking tray, and sprinkle with ¼ tsp each salt and black pepper. Divide spinach mixture among chicken slices and roll up to enclose. 
  5. Coat chicken with a little oil and roll in remaining nuts (I pour some oil into a pyrex baking dish, roll the chicken in it, then in the walnuts, and place it in the pyrex to bake). 
  6. Bake until chicken is cooked through, 30 to 35 minutes. 


Sunday, April 14, 2013

Lentil & Beef Sloppy Joes (& Cheesy Hamburger Buns)

The sloppy Joe: I hadn't had one in years, but one day browsing recipes I saw one for a lentil sloppy Joe. I was intrigued, and it kind of sounded good. I bookmarked it and came back to it a few weeks later. The original recipe I saw did not suit me, so I looked around a bit more and found this one which was a better match for what I had on hand.

You may notice that the recipe I followed calls for 1/2 cup ketchup. In an odd turn of events, we had used more of our ketchup than I had realized (although, honestly, I hate ketchup and didn't check before I started the recipe. When you dislike ketchup like I do you never dream you'll run out... I only use it in recipes, and the only other thing I've used it in that I can think of is meatloaf, maybe twice. We occasionally have hot dogs or other dishes that Thomas likes ketchup as a condiment on, but I really didn't think we'd have less than 1/2 cup!). Pondering possible substitutions, I came up with barbecue sauce or tomato sauce. I asked Thomas' opinion and we decided to try the barbecue sauce. It was a success! It added a really nice flavor and sweetness that I don't think it would have had otherwise. In the future I think I will always do half ketchup and half barbecue sauce.

Lentil & Beef Sloppy Joes

2 Tbsp. vegetable oil
1/2 cup diced onion
1 small carrot, diced
1/2 bell pepper, diced
1/4 cup ketchup
1/4 cup barbecue sauce
1 clove garlic, minced
1/2 cup dried brown lentils
~1 cup water
1/4 tsp. oregano
8 ounces ground beef
1 Tbsp. Worcestershire sauce
  1. Sauté onion, carrot, bell pepper, and ketchup in vegetable oil in a saucepan over medium-high heat until vegetables are tender. Add garlic and continue to cook for about a minute.
  2. Add lentils, oregano, and water. Boil about 5 minutes, then reduce heat and cover, simmering about 35 minutes. Check occasionally to ensure there is enough water. Add more water in 1/4 cup increments if necessary.
  3. In the meantime, brown ground beef in a skillet. Drain off fat.
  4. To ground beef, add Worcestershire sauce and barbecue sauce, stirring until combined.
  5. Add fully cooked ground beef mixture to lentil mixture. Continue cooking until lentils are done.
  6. Serve hot, on hamburger buns.
I don't keep hamburger buns around, so I made my own to go with my sloppy Joes. I used this recipe. They turned out pretty good, but I did goof up a little: where the recipe said to make 6 buns, I split my dough 6 ways and ended up with 6 buns, but they were such a funny shape I couldn't justify slicing them. The result was basically 6 bun halves. Which was fine, but they were kind of big and it would have been better to have 6 actual buns. So, if you want 6 buns, divide your dough 12 ways...

Cheesy Hamburger Buns

2 3/4 cups flour
1/2 cup finely grated cheddar cheese
3/4 tsp. salt
1 Tbsp. sugar
2 1/2 tsp. instant yeast
4 Tbsp. softened butter
1 large egg
2/3-3/4 cup lukewarm water
  1. Mix all ingredients until well combined, sticky, and gooey. Cover and let rise about an hour.
  2. Preheat oven to 350°F.
  3. Divide dough (taking into account my advice above). Your dough will still be sticky. You can add a little bit of flour to make this process less messy. Place on baking sheet lined with wax paper or parchment paper. Shape into small rounds. The original recipe uses a hamburger bun pan. I used a baking sheet, which resulted in misshapen buns, but it's what I had :o)
  4. Let rise another 30-60 minutes, or longer if you have time.
  5. Bake about 20 minutes.

Monday, December 26, 2011

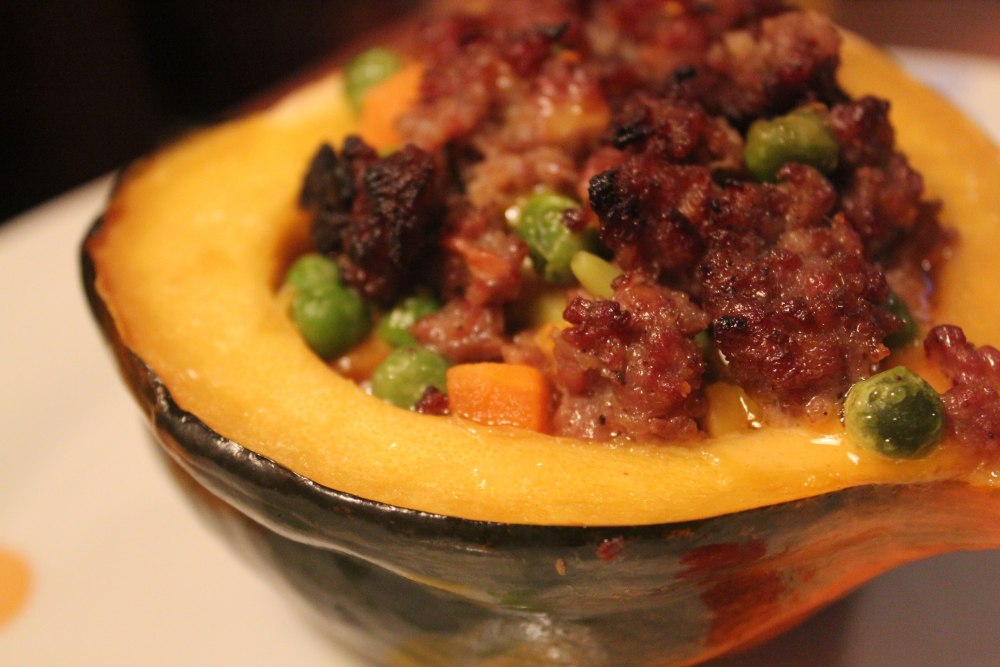
Sausage Stuffed Acorn Squash

A while back, Thomas and I got a second-hand craft/idea/cook-book called "Homespun Christmas". We decided since it is the season, after all, that we would try out some of the recipes.

One success we have had is a recipe (p. 78) for sausage stuffed acorn squash. We had never had acorn squash before, so it was an interesting experiment for that reason alone! We learned that acorn squash looks and smells a lot like pumpkin. It seems sweeter if the outside has some orange spots. To really get all the squash meat out you will need a spoon to eat this dish, or perhaps it would be helpful to peel the squash before baking.


Sausage Stuffed Acorn Squash
1 lb. pork sausage meat
3 medium acorn squash
1/4 c butter/margarine (melted)
10-oz. package frozen mixed vegetables
1 c cheddar cheese, cubed (we did not use this much... more like 1/4 c shredded)
  1. Preheat oven to 350°F. 
  2. Brown sausage on stove. Drain and discard fat.
  3. Cut squash in half length-wise and remove seeds. Place halves, cut side up, in baking dish (we actually only used 2 squash and they fit in a 9x13" pan... but there was too much filling for just the 4 halves).
  4. Brush insides with melted butter and sprinkle with salt.
  5. In a medium bowl (or the pan you used to brown sausage), combine sausage, vegetables, cheese, and salt to taste.
  6. Divide mixture among squash halves. Brush with remaining butter.
  7. Cover pan tightly with foil and bake 1-1 1/2 hours, or until squash is fork tender.

Sunday, April 3, 2011

Homemade Chimichangas

Thomas' brother's family got us a cookbook for Christmas called Fabulous Freezer Meals. The author, Jenny Ahlstrom Stanger, provides all sorts of recipes based on pre-made meal "building blocks" you can cook and store in advance, like taco meat or spaghetti sauce. I personally can't wait to try some of the recipes the ice cream cake section...

Anyway, we recently adapted her recipe for chimichangas. They turned out awesome, and they freeze pretty well, so if you feel like cooking a ton of them, you can easily have several meals from it.

Chimichangas
1 lb ground beef
about 1/2 a medium onion
1 regular can refried beans OR whole pinto beans
shredded cheese (about 1 cup)
about 8 flour tortillas
vegetable oil
  1. Heat onions in a frying pan (in a little bit of oil). Add beef. Season to taste, using salt, pepper, cumin, garlic powder, etc.
  2. Once beef is browned, drain and cool for a few minutes.
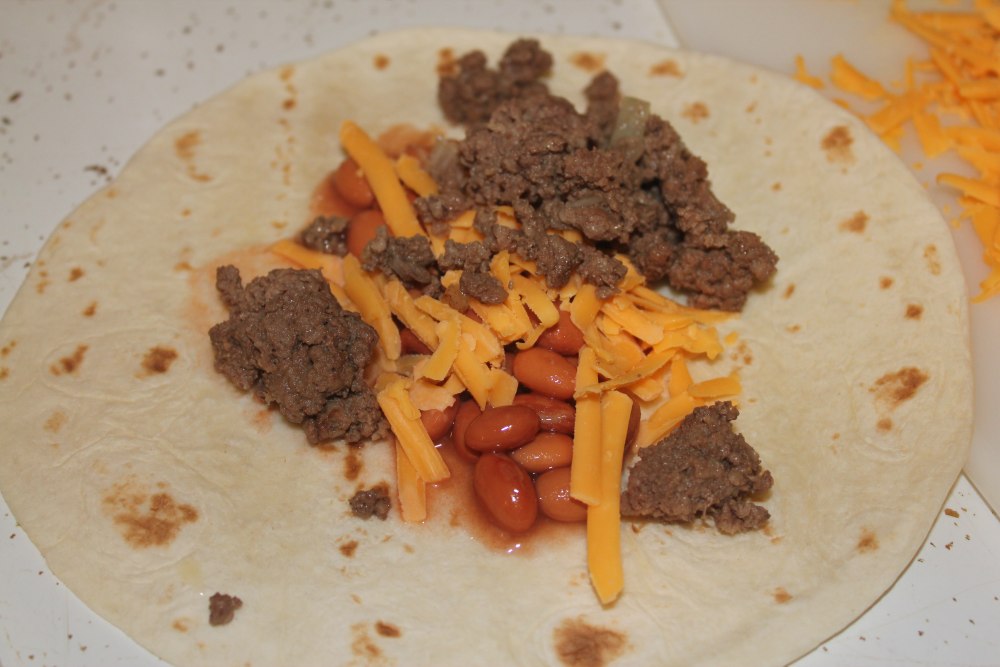
  3. Build chimichangas one at a time by placing a little bit of the beef, a spoonful of the beans, and some cheese in the center of a flour tortilla.
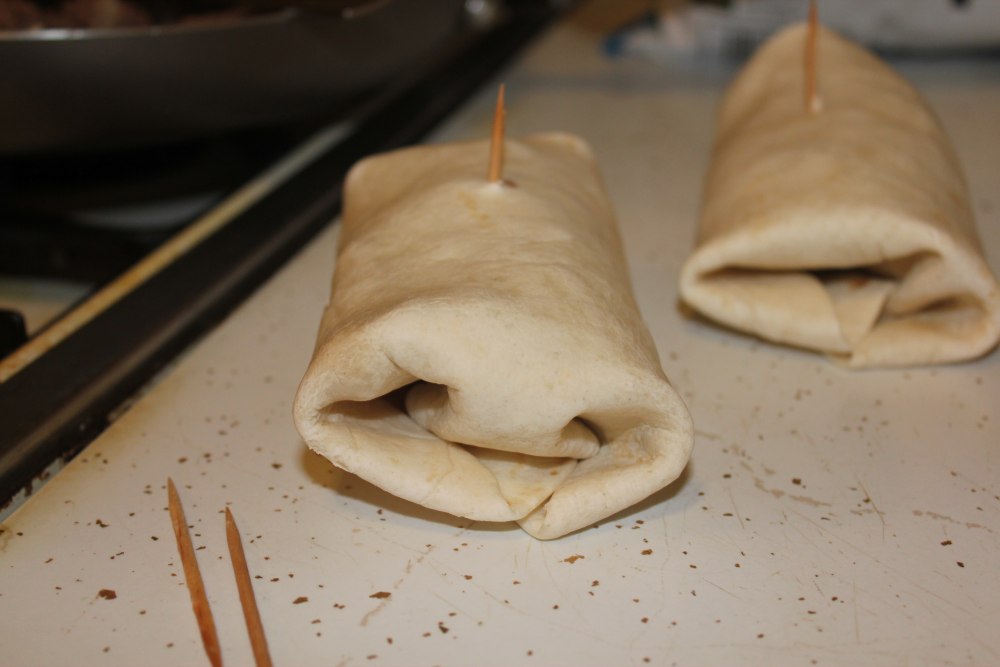
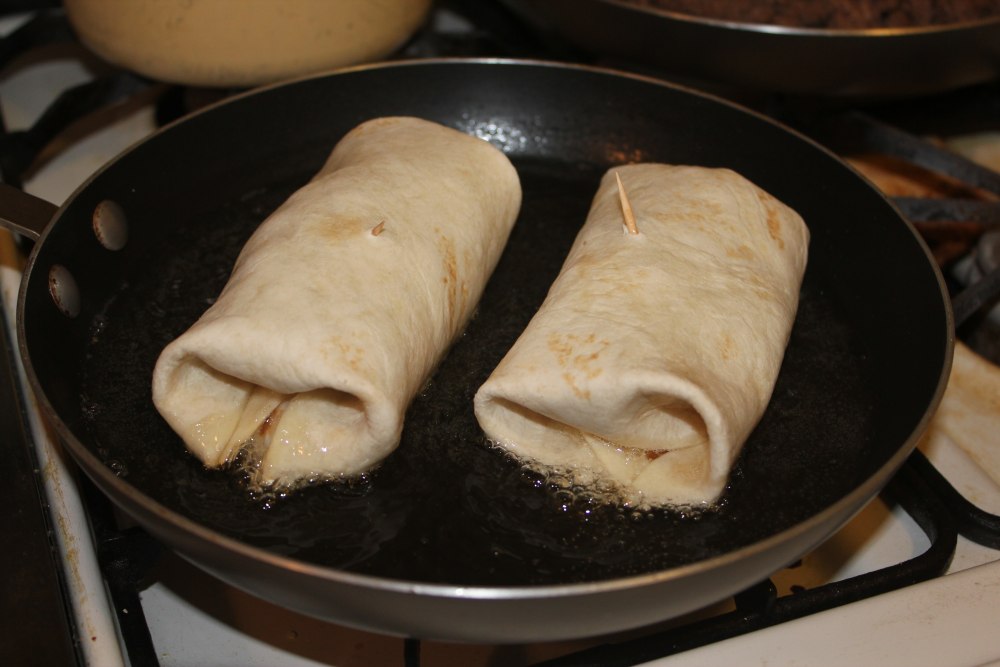
  4. Roll chimichangas, folding two sides in for the "ends" and then folding the rest in on itself. Secure with a toothpick.
  5. Heat some vegetable oil in a small frying pan, enough that you have about 1/4 inch of oil in the bottom. 
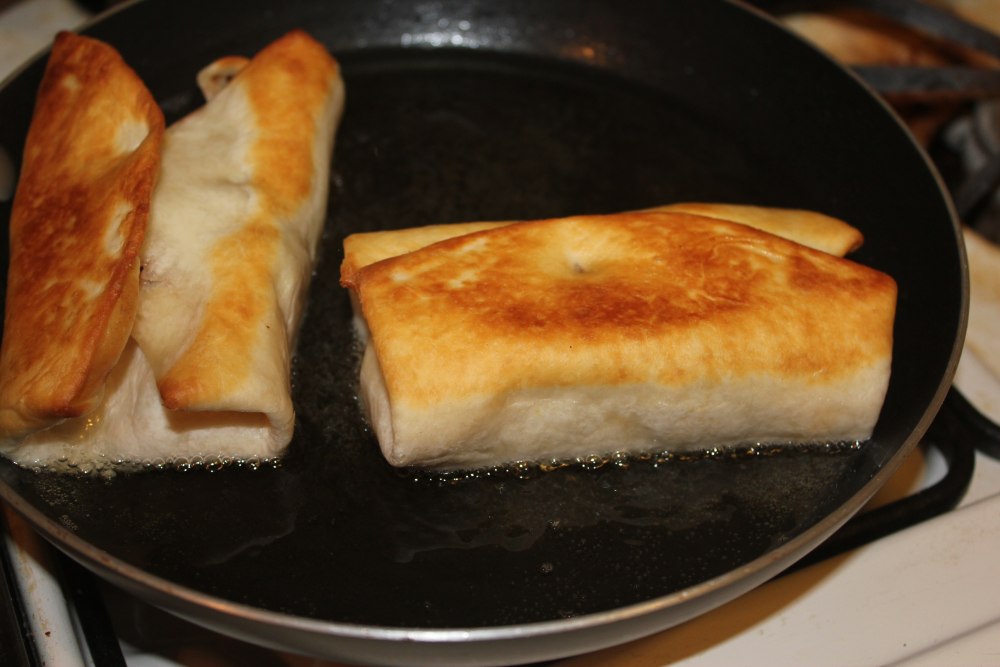
  6. Place chimichangas (we did two at a time) seam-side down in the hot oil. After it cooks for a few minutes, the tortilla will be golden brown and it should stay (mostly) closed. At this point, flip the chimichanga in the oil using tongs and/or other utensils, very carefully.
  7. Once brown on both sides, transfer to a plate covered with a paper towel to drain the oil.


    Wednesday, March 30, 2011

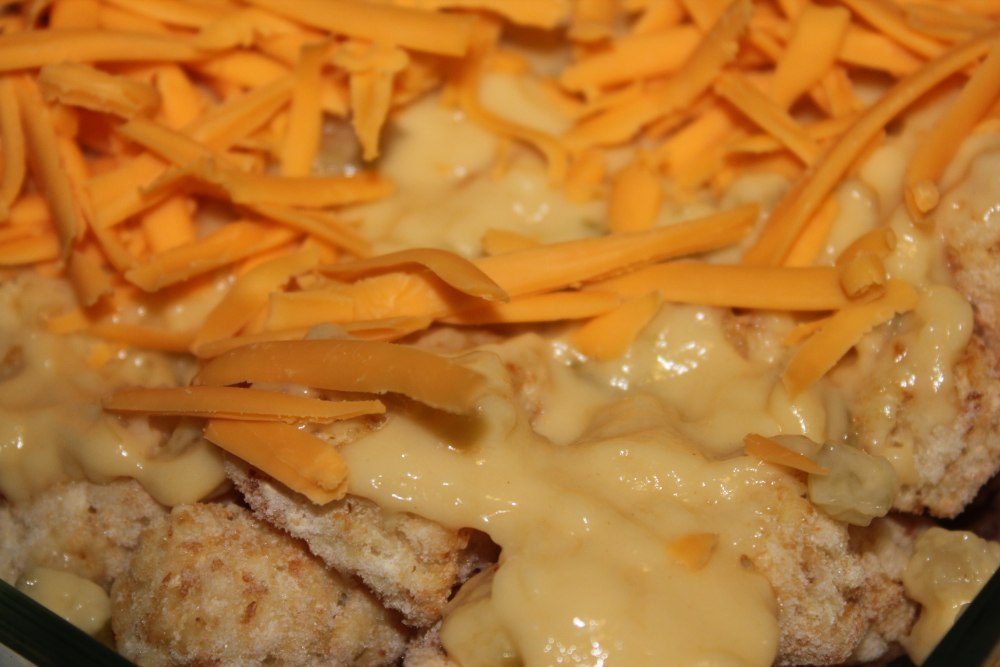
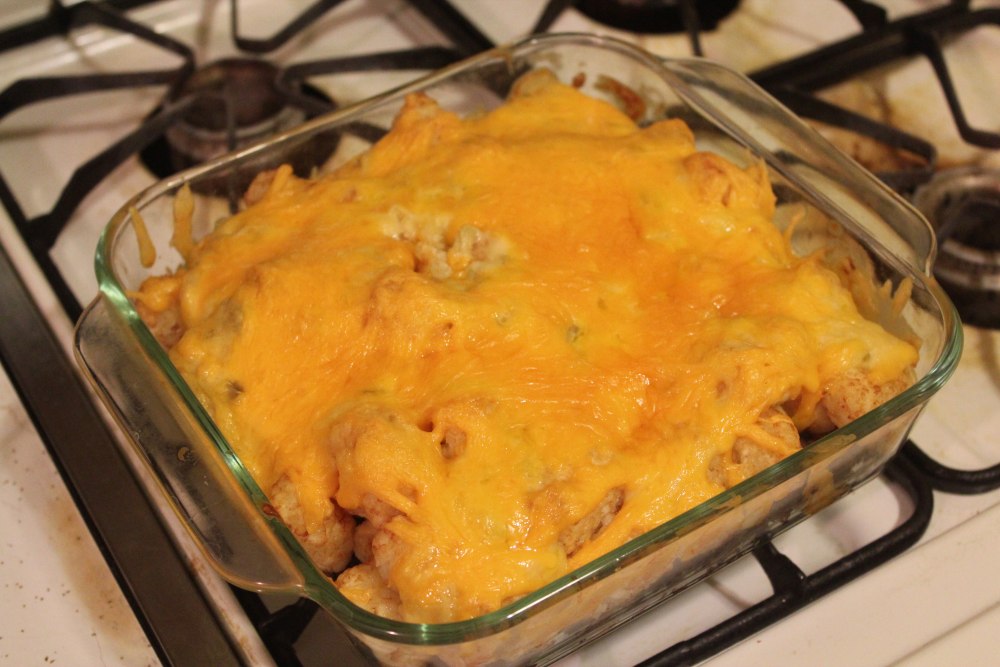
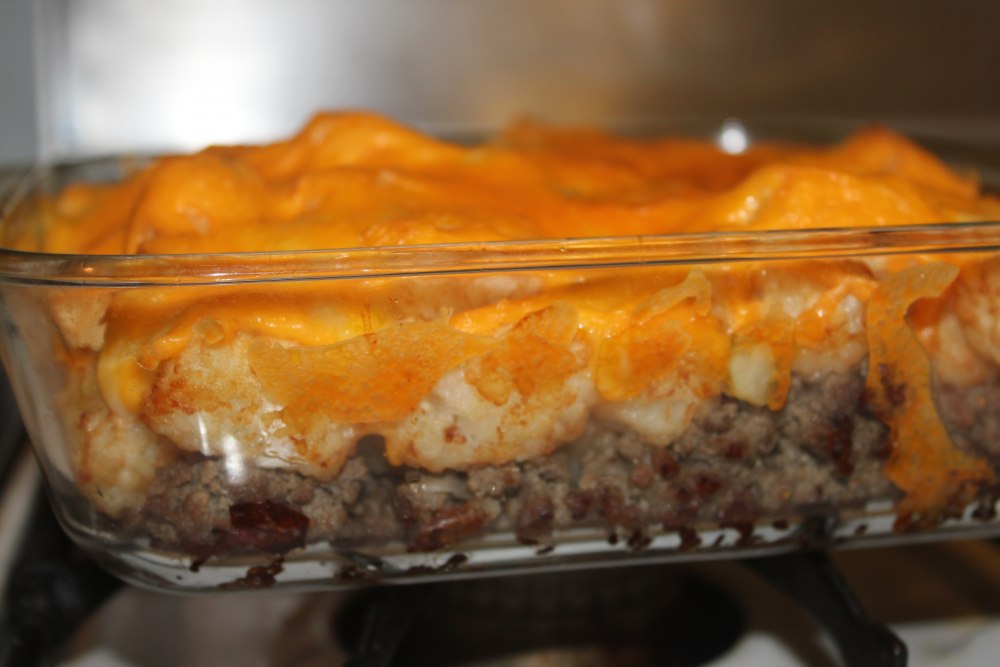
    Tater Tot Casserole

    My cousin Kimberly got married last year, the weekend before we did. While we were both in the wedding-planning stage, she sent me this yummy recipe. Good luck in Florida, Kim!

    Tater Tot Casserole
    1 lb ground beef
    1 package frozen tater tots
    1 block cheddar cheese
    2-3 cans cream of celery soup
    (to serve two, we used a little less than a pound of beef, about half of a package of tater tots, just enough cheese to cover the top of our 9*9 baking dish, and only one can of soup)
    1. Preheat oven to 375°F.
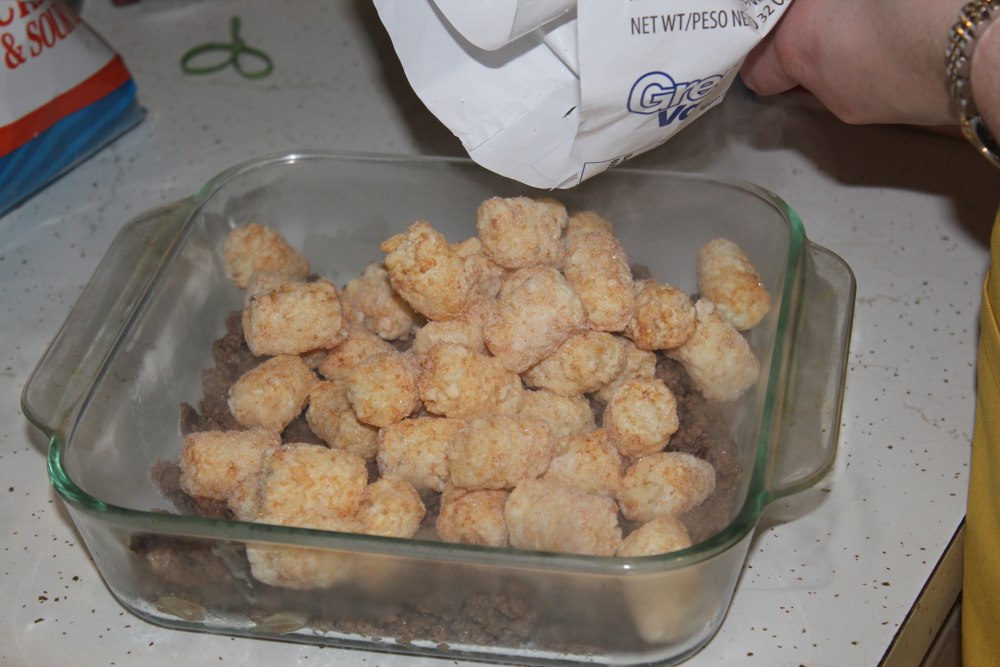
    2. Brown meat on the stovetop. Season to taste, using your preferred spices. Drain and place in the bottom of a square or rectangular baking dish.
    3. Layer tater tots over beef.
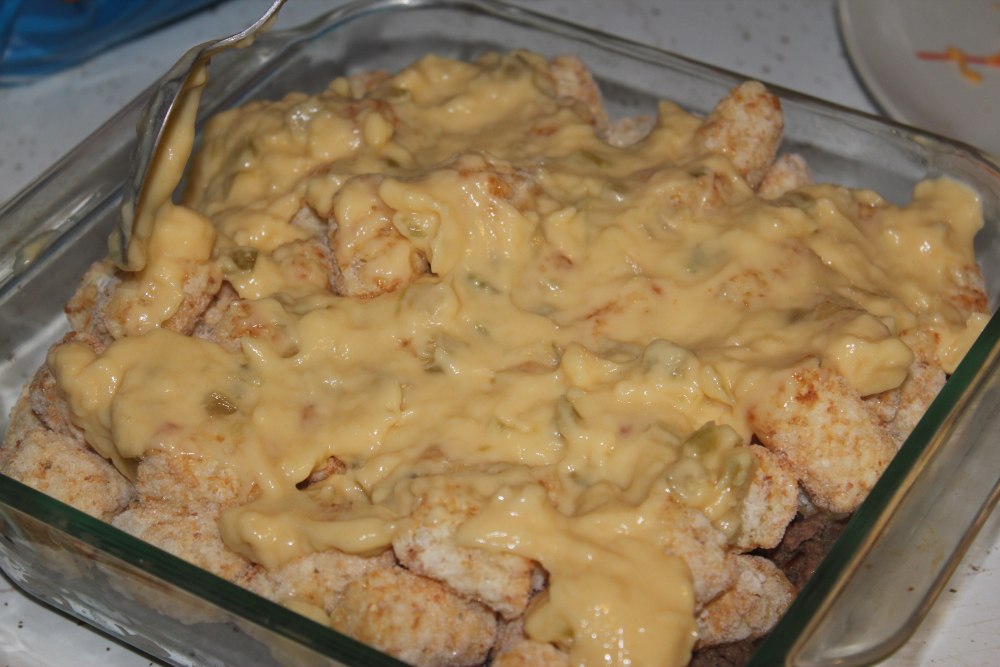
    4. Pour cream of celery soup over tater tots. We did not mix the layers at this point, but it might help to do so.
    5. Place shredded cheese on the very top. Bake for 45 minutes, or until tater tots are sufficiently heated and cheese has melted.


      Wednesday, February 9, 2011

      Stuffed Bell Peppers


      A meal that we ate somewhat frequently at my house growing up was stuffed bell peppers. They're pretty easy to throw together, although they do take some time to cook, and they're tasty and filling.

      Stuffed Bell Peppers
      2-4 green bell peppers
      1 lb ground beef, less if you want juicier peppers
      1 can stewed tomatoes
      about 1 cup uncooked rice; less if you want juicier peppers
      cheese of your choice
      1. Preheat oven to about 375°F. Slightly brown ground beef, seasoning as desired, and cook rice per package instructions.
      2. Cut stem from peppers and remove seeds
      3. Drain beef. Combine with rice, tomatoes, and a little bit of cheese.
      4. Fill peppers with this mixture, and sprinkle some cheese on top. Bake for approximately 45 minutes. When done, peppers should be tender and cheese should be melted. You can make this without cooking the rice and beef first, but it will take longer in the oven.


      Sunday, October 10, 2010

      Tuna Taco Things

      What do you do with this combination of ingredients? See below for my solution!
       As a senior in high school, my class schedule was such that I could go home for the day after lunch. Thus, I typically did not bring a lunch to school, but instead ate upon arriving home.

      This gave me an opportunity to experiment with my cooking. One of my experimental recipes from back then has made its debut here at the Bradshaw residence. Try it for yourself, and please let me know what you think!

      Tuna Taco Things

      corn tortillas (3-4)
      1 can tuna in water
      about 2-3 Tbsp. mayonnaise
      1/4 cup frozen mixed vegetables (corn/peas/carrots/green beans)
      cheese of your choice, sliced into strips: cheddar or Monterey Jack work well
      spices, to taste: I add salt, pepper, garlic (the usual)

      1. Drain tuna. Put in bowl along with mayonnaise and selected spices. Mix together with a fork.
      2. Boil/otherwise heat frozen vegetables. Drain and add to tuna mixture. You may choose to add a bit more mayonnaise for the right balance/texture.
      3. Heat tortillas in a frying pan with a little oil. Flip at least once, then place a strip of cheese into the center and fold tortilla with a spatula. Let cheese begin to melt, then set aside and continue with the remaining tortillas.
      4. Spoon tuna mixture into tortilla shells.
      5. Enjoy!


      oxox

      Tuesday, September 28, 2010

      Enchiladas à la Lisa

      (at the bottom, it will say that this was posted by Thomas, but don't believe it. This is Lisa posting.) ;o)


      When I first moved out to Utah two years ago for school, I had this ongoing list in my head of "Top 10 Single College-Student Dinners." Unfortunately, I did not write it down, but (for me at least) it included Little Caesar's $5 pepperoni pizzas, Top Ramen with frozen veggies, and beef enchiladas.

      This weekend I had the opportunity to roll some yummy enchiladas for a little former-roommate party at our apartment. Thomas encouraged me to take some photos, so here you are:

      Enchiladas

      1 can red enchilada sauce (I used the large can of Las Palmas Enchilada Sauce this time, but Old El Paso would be my top choice)
      1 small onion, diced
      1 Tbsp. or so of oil
      ground beef (you need about 1 lb if using the small can of sauce; I used about 2 lbs with the large can)
      spices of your choice; I like some garlic, salt, pepper.
      small corn tortillas (about 15, for the larger can of sauce)
      approx. 1 1/2 cups of grated cheese (I prefer Monterey Jack)

      1. Heat a small amount of oil in a frying pan. Add onion pieces and let them cook and soften for a few minutes.
      2. Add ground beef. Season to your liking and allow to brown.
      3. Once cooked, drain your meat.
      4. To the cooked, drained beef, add about half of the can of enchilada sauce and about half of the grated cheese.
      5. Spoon a bit of this mixture into a corn tortilla**. Roll it up and place it with the overlap down into a lightly greased baking dish. If you use the large can of sauce, like I did, you'll need a 9*13 plus a 9*9. 
      6. Continue filling tortillas and placing them in your baking dish until your filling runs out.
      7. Pour the remaining enchilada sauce over the rolled enchiladas. Use a spoon or other utensil to ensure the sauce covers as much of the exposed tortillas as possible, as this will reduce dryness. Top with the rest of your cheese.
      8. Bake for 30 minutes at 350°. Serve with your favorite salsa or guacamole, and perhaps some rice or refried beans!

      **Depending on the corn tortillas you are using, you may notice that after sitting in the pan for a moment, they will crack along the top. To remedy this, it is helpful to take individual tortillas, place them into a damp paper towel, and microwave for about 12 seconds before filling and rolling. I used La Banderita brand tortillas this time and did not find this step necessary.


      Happy cooking! oxox

      Wednesday, July 14, 2010

      Tortellini Alfredo and a Side

      Thank you for your latest comments! Please keep 'em comin'!

      Lisa apparently likes LOVES tortellini, so when she saw it in the store, she was tempted. Thomas, being the ever-adventurous fool, thwarts the purchase by a simple and effective phrase: "Why don't we make it?" We have yet to be unsuccessful (and in fact everything we've posted is delicious), but tortellini-making is not for the faint of heart. You've been warned. The mozzarella sticks are quite easy and tasty, though, so even if you skip ahead, give them a try.


      Tortellini Alfredo

      While making this delicious pasta, we learned some lessons about life. First of all, even when you have someone else's detailed instruction or advice, it may not apply to your situation. It helps to be flexible and creative enough to try things they didn't, even without knowing what the consequences will be. Second, you can't make it through life on your own. Everyone comes across unexpected and difficult trials, and we all need somebody to help us through! Finally, things take time. If you want the best for yourself and your family, you have to put in the effort and stick around till things turn out.

      We adapted the tortellini recipe found here.

      Pasta

      3 1/2 cups flour
      5 large (or 4 jumbo) eggs

      1) Mix flour and eggs together. We used the advice found on the site mentioned above; we put the flour on the table and made a well for the eggs, then began mixing with a fork. After a while, we tossed the fork and used our hands.
      2) Knead forever. The pasta-making alone took us probably an hour or two.
      3) If you're like us, and you're making this in Utah (read VERY DRY) in the summer (read HOT), you will find that your dough is drying out very quickly and completely falling apart. We sprinkled some water in when this happened and it seemed to help.
      4) Once the gluten begins to develop and your dough is soft (for far more detail, use the link above), wrap your dough in plastic wrap and let sit at room temperature for 30 minutes or so.
      5) While waiting, work on your pasta filling (below) and start your sauce (further below).
      6) When ready, divide up the dough so you are working with a small portion (a fourth or so) at a time. Keep the rest covered.
      7) Roll out the dough. You want it very thin. It is very thick, heavy dough and you will use your muscles. It is dry, though, so you won't need to flour your work surface.
      8) Immediately cut out your tortellini circles. We used a small (2" or so) glass bowl. Keep them covered until you fill them.
      9) You can use scraps again, but you will need to wet them because they'll dry out before you can re-roll them.
      10) When you fill them, don't over-fill them! You want just a small bit. Seal them with a small bit of water; fold them in half. Then shape them (the corners of the half circle will overlap).
      11) Once they're all ready (we had about 50), boil them in water until the pasta is to your liking!


      Filling

      approx. 8 oz. ricotta cheese
      4 oz. mozzarella cheese
      1/4 cup grated Parmesan cheese
      seasonings to taste (we used minced garlic and Italian seasoning)

      1) Grate mozzarella (and Parmesan if you buy in a block).
      2) Combine all ingredients. Taste-test and alter until you're happy with it.
      3) Use this to fill your pasta circles to make tortellini!


      Alfredo

      1/2 lb bacon
      a few mushrooms
      1 Tbsp butter
      2 boneless/skinless chicken breasts
      1 cup or so of milk
      3 Tbsp butter
      a bit of cheese - we used what we had leftover from our tortellini filling - and it worked out just right.
      2 Tbsp (approx) flour

      1) Cook bacon.
      2) Use some bacon grease to sautee mushrooms. Add 1 Tbsp butter and some seasoning (garlic, pepper).
      3) Crumble bacon and cut up uncooked chicken into bite-sized pieces. Add to sauteing mushrooms.
      4) Use a low heat setting. We let this sit on the stove, slowly simmering, while we rolled/cut/stuffed our pasta dough.
      5) In a saucepan, melt 3 Tbsp butter.
      6) Add milk. Stir for a few minutes.
      7) Add cheese. Stir until melted in.
      8) Add flour. You can whisk this so it blends smoothly into the sauce. This will thicken the ingredients into a sauce.
      9) Add mushroom/bacon/chicken mixture to sauce.
      10) Pour over cooked tortellini and enjoy!

      (our favorite deal - $5.37 for 3 lbs at Walmart)


      Mozzarella Sticks(adapted from this recipe)

      about 12 oz. mozzarella cheese
      about 1 cup Italian-style bread crumbs
      about 1/2 cup grated Parmesan cheese
      some salt
      3 large eggs
      vegetable oil for deep-frying

      1) Cut cheese into small sticks - about 4 inches * 1/2 * 1/2.
      2) In a small bowl (but not too small - you'll need to be able to dip cheese sticks in), combine bread crumbs, Parmesan cheese, and salt/other seasonings (to taste).
      3) In another small bowl, mix up eggs.
      4) One cheese stick at a time, dip into eggs, then into bread crumb/cheese/seasoning mixture. Coat well, and set on a plate or something.
      5) Once completed, do this a second time (so you'll have 2 layers each of egg/bread crumb mixture on each cheese stick). It's ok if they break, just make sure the ends get egg/bread crumbs on them too.
      6) When they've all been dipped and double-dipped (hehe), stick them all in the freezer for a little while, until they are frozen.
      7) Once frozen, remove from freezer. Pour some vegetable oil into a small pan and heat it up.
      8) Add cheese sticks to oil. Use tongs to flip them. Once they're a pretty golden-brown color, you can take them out and let them rest on a paper towel to drain the grease. Enjoy!