Showing posts with label bacon. Show all posts

Sunday, August 27, 2017

Chicken Bake

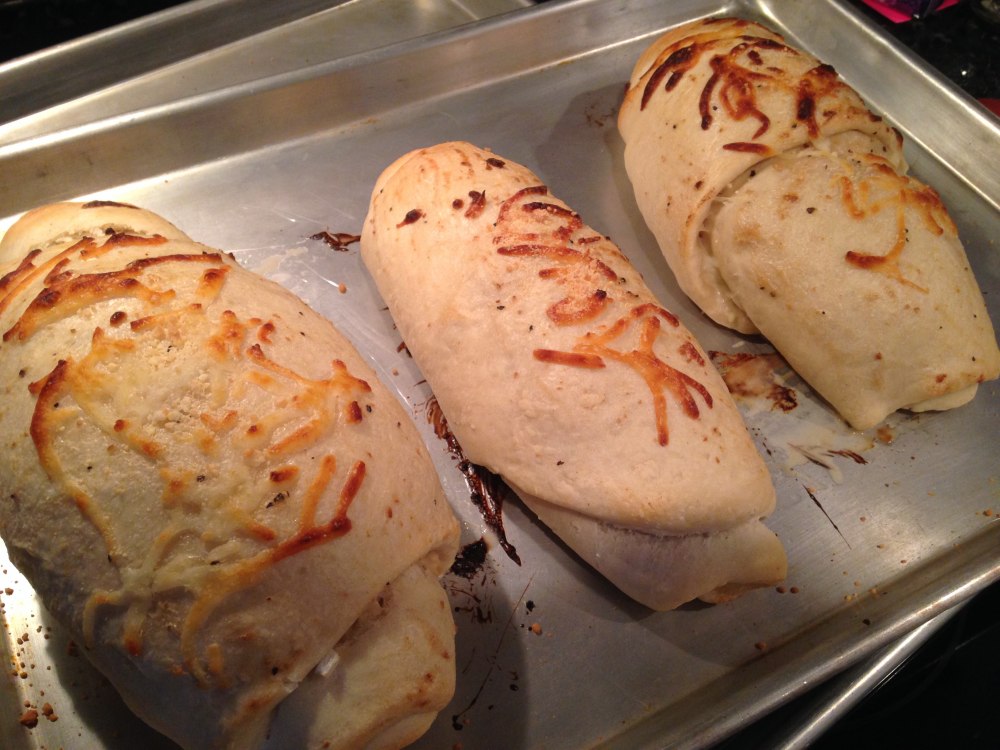
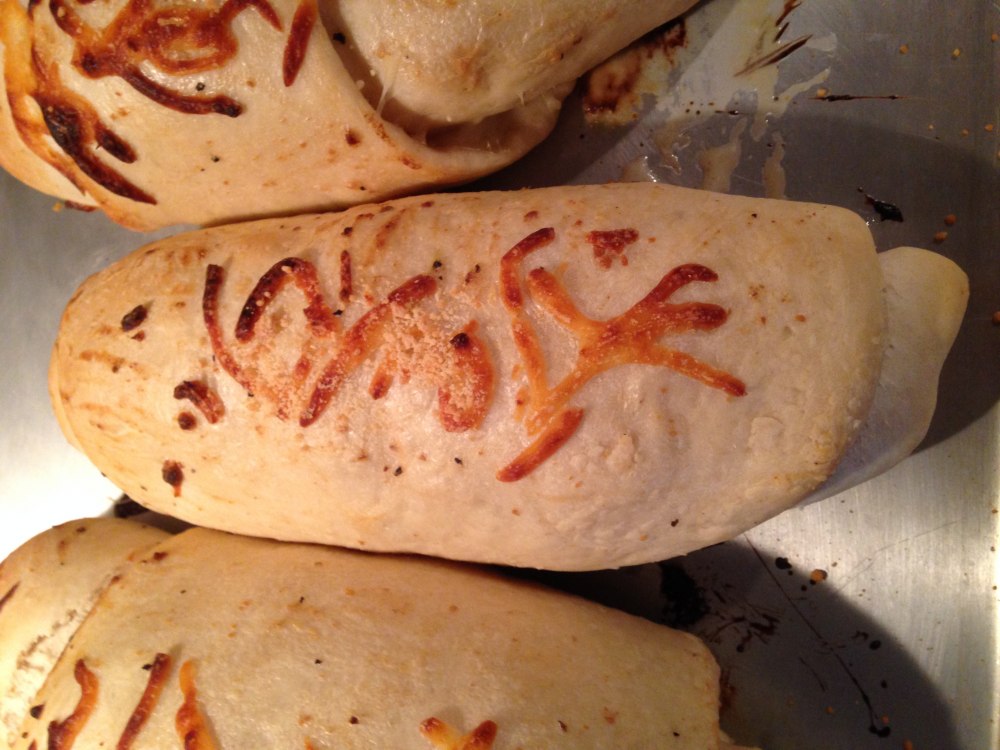
Costco chicken bakes, the ones from the cafe (or also available to purchase frozen), are a yummy treat my parents used to buy me. Since we don't live near a Costco, I decided to try to make my own. These are a bit more bready (not necessarily a bad thing!) than I remember the Costco ones being, but the flavor is about right. I originally followed this recipe on Redefined Mom but the most recent time I made them, I changed a few things and liked the result a lot better. I used the amounts below and ended up with 4 enormous chicken bakes (one is sufficient to feed my family as a meal with a side of vegetables). I froze the extras to eat later!


Chicken Bake

one batch pizza dough
2-3 chicken breasts, baked ahead of time and cut into bite-sized pieces
1/2 large onion, diced
6-8 strips of bacon, cooked and cut into small pieces
a few artichoke hearts, diced
2-3 cups shredded mozzarella cheese
1/2 bottle caesar dressing

  1. (Prep work: bake frozen chicken breasts, lightly seasoned with salt and pepper, at 375°F for 35-40 minutes, until done. Allow to cool, then chop into bite-sized pieces. While baking, you can fry up your bacon & drain on paper towels, and make a batch of pizza dough.)
  2. Preheat oven to 400°F.
  3. Dice onion and cut bacon into small pieces. In a large bowl, combine onion, bacon, artichoke hearts, and chicken.
  4. Add 1/4 to 1/2 cup caesar dressing and mix until everything is well-coated.
  5. Divide dough into 4 even balls (or more if you'd like smaller chicken bakes). Roll each section into a large rectangle, with dough as thin as possible. 
  6. Generously brush a few tablespoonfuls of caesar dressing onto each dough rectangle. Don't skimp!
  7. Scoop 1/2 cup or so of the chicken-bacon-onion-artichoke hearts mixture unto each dough rectangle and spread out into a single layer, leaving a couple of inches of space at one end.
  8. Generously sprinkle cheese over the chicken mixture.
  9. Roll up dough rectangle, ending at the side with a couple inches of space. Use the extra dough to seal it up. Place seam-side down onto a baking sheet. Brush with caesar dressing and sprinkle with more mozzarella cheese.
  10. Bake 15-20 minutes, until golden brown on the outside. Serve hot; can be eaten like a sandwich or cut into rounds and eaten with a fork.


Wednesday, July 14, 2010

Tortellini Alfredo and a Side

Thank you for your latest comments! Please keep 'em comin'!

Lisa apparently likes LOVES tortellini, so when she saw it in the store, she was tempted. Thomas, being the ever-adventurous fool, thwarts the purchase by a simple and effective phrase: "Why don't we make it?" We have yet to be unsuccessful (and in fact everything we've posted is delicious), but tortellini-making is not for the faint of heart. You've been warned. The mozzarella sticks are quite easy and tasty, though, so even if you skip ahead, give them a try.


Tortellini Alfredo

While making this delicious pasta, we learned some lessons about life. First of all, even when you have someone else's detailed instruction or advice, it may not apply to your situation. It helps to be flexible and creative enough to try things they didn't, even without knowing what the consequences will be. Second, you can't make it through life on your own. Everyone comes across unexpected and difficult trials, and we all need somebody to help us through! Finally, things take time. If you want the best for yourself and your family, you have to put in the effort and stick around till things turn out.

We adapted the tortellini recipe found here.

Pasta

3 1/2 cups flour
5 large (or 4 jumbo) eggs

1) Mix flour and eggs together. We used the advice found on the site mentioned above; we put the flour on the table and made a well for the eggs, then began mixing with a fork. After a while, we tossed the fork and used our hands.
2) Knead forever. The pasta-making alone took us probably an hour or two.
3) If you're like us, and you're making this in Utah (read VERY DRY) in the summer (read HOT), you will find that your dough is drying out very quickly and completely falling apart. We sprinkled some water in when this happened and it seemed to help.
4) Once the gluten begins to develop and your dough is soft (for far more detail, use the link above), wrap your dough in plastic wrap and let sit at room temperature for 30 minutes or so.
5) While waiting, work on your pasta filling (below) and start your sauce (further below).
6) When ready, divide up the dough so you are working with a small portion (a fourth or so) at a time. Keep the rest covered.
7) Roll out the dough. You want it very thin. It is very thick, heavy dough and you will use your muscles. It is dry, though, so you won't need to flour your work surface.
8) Immediately cut out your tortellini circles. We used a small (2" or so) glass bowl. Keep them covered until you fill them.
9) You can use scraps again, but you will need to wet them because they'll dry out before you can re-roll them.
10) When you fill them, don't over-fill them! You want just a small bit. Seal them with a small bit of water; fold them in half. Then shape them (the corners of the half circle will overlap).
11) Once they're all ready (we had about 50), boil them in water until the pasta is to your liking!


Filling

approx. 8 oz. ricotta cheese
4 oz. mozzarella cheese
1/4 cup grated Parmesan cheese
seasonings to taste (we used minced garlic and Italian seasoning)

1) Grate mozzarella (and Parmesan if you buy in a block).
2) Combine all ingredients. Taste-test and alter until you're happy with it.
3) Use this to fill your pasta circles to make tortellini!


Alfredo

1/2 lb bacon
a few mushrooms
1 Tbsp butter
2 boneless/skinless chicken breasts
1 cup or so of milk
3 Tbsp butter
a bit of cheese - we used what we had leftover from our tortellini filling - and it worked out just right.
2 Tbsp (approx) flour

1) Cook bacon.
2) Use some bacon grease to sautee mushrooms. Add 1 Tbsp butter and some seasoning (garlic, pepper).
3) Crumble bacon and cut up uncooked chicken into bite-sized pieces. Add to sauteing mushrooms.
4) Use a low heat setting. We let this sit on the stove, slowly simmering, while we rolled/cut/stuffed our pasta dough.
5) In a saucepan, melt 3 Tbsp butter.
6) Add milk. Stir for a few minutes.
7) Add cheese. Stir until melted in.
8) Add flour. You can whisk this so it blends smoothly into the sauce. This will thicken the ingredients into a sauce.
9) Add mushroom/bacon/chicken mixture to sauce.
10) Pour over cooked tortellini and enjoy!

(our favorite deal - $5.37 for 3 lbs at Walmart)


Mozzarella Sticks(adapted from this recipe)

about 12 oz. mozzarella cheese
about 1 cup Italian-style bread crumbs
about 1/2 cup grated Parmesan cheese
some salt
3 large eggs
vegetable oil for deep-frying

1) Cut cheese into small sticks - about 4 inches * 1/2 * 1/2.
2) In a small bowl (but not too small - you'll need to be able to dip cheese sticks in), combine bread crumbs, Parmesan cheese, and salt/other seasonings (to taste).
3) In another small bowl, mix up eggs.
4) One cheese stick at a time, dip into eggs, then into bread crumb/cheese/seasoning mixture. Coat well, and set on a plate or something.
5) Once completed, do this a second time (so you'll have 2 layers each of egg/bread crumb mixture on each cheese stick). It's ok if they break, just make sure the ends get egg/bread crumbs on them too.
6) When they've all been dipped and double-dipped (hehe), stick them all in the freezer for a little while, until they are frozen.
7) Once frozen, remove from freezer. Pour some vegetable oil into a small pan and heat it up.
8) Add cheese sticks to oil. Use tongs to flip them. Once they're a pretty golden-brown color, you can take them out and let them rest on a paper towel to drain the grease. Enjoy!


Sunday, June 20, 2010

Ready for another heart-stopper?!

So, as you may or may not have realized, we like bacon around here! (Quiche, bacon-wrapped eggs, bacon pizza...)

This time, we may have gone over the top. Just keep in mind that the Bacon Explosion was somebody else's creation! :o) And don't worry... we kept it a balanced meal. Scroll down for the Strawberry & Spinach Salad.

Bacon Explosion

2 lbs bacon strips
2 lbs Italian sausage
barbecue sauce

See the Bacon Explosion website for more detailed directions.
  1. Weave about half of the bacon together on a baking dish.
  2. Add any spices you want to add.
  3. Spread sausage over bacon mat.
  4. Cook the rest of the bacon to your liking. Crumble it up and put it on top of the sausage.
  5. Add barbecue sauce.
  6. Roll up the sausage with the bacon pieces inside.
  7. Conclude assembly by rolling up bacon weave around sausage creation.
  8. Now, you can either barbecue this as suggested in their website, or you can bake it like we did. We set the oven at around 250 degrees (F) and let it cook for about 2 hours.
Please dispose of the grease safely. You will end up with... A LOT! Let it cool before you pour it into a container to throw away. Please don't pour it down your sink... this will cause problems for you!


Strawberry & Spinach Salad

1 bunch of spinach
1 pound of strawberries
about 1/2 cup walnuts
about 2-3 Tablespoons sugar
salad dressing of your choice - we used Brianna's poppyseed dressing but this would be great with a vinaigrette.
  1. Rinse spinach and take stems off. Keep the leaves; dry them and place them in your salad bowl.
  2. Rinse strawberries. Remove leaves and slice.
  3. Chop/crush walnuts. You'll want them to be in small pieces. They garnish this salad.
  4. Heat sugar in small sauce pan. Once it is liquid, QUICKLY add walnuts, stirring, and remove from heat. Now you have caramelized walnuts.
  5. Add strawberry slices and caramelized walnuts to spinach. Dress with dressing of your choice. Enjoy!


We devoured our Bacon Explosion with the Strawberry & Spinach salad and some mashed potatoes to make it a balanced meal.


Our nieces, Lydia and Ruby, really loved this dinner!


 oxox

Wednesday, June 2, 2010

Quiche Lorraine

A slightly modified submission to the blog by Thomas' mom, this came from his dad's (her husband's) mother. A few quotes and tips that came with the submission:
  • "It is the best American recipe I have ever had, and is a good as many- (better than the poor quality) french ones."
  • Use a deep dish pie pan. You can use a regular pie plate, but you will have too much liquid.
  • It will actually taste even better one day after. (Maybe you should double it for leftovers.)
  • "Bon appetit!"


Quiche Lorraine

Pie Shell
1.5 C flour
1/2 t salt
1/2 C shortening
4-5 T cold water
  1. Mix flour and salt.
  2. Cut in shortening.
  3. Mix water in slowly until all is moistened.
  4. Form into a ball, and roll to about 1/8" thick.
  5. Transfer the shell to a greased pie pan and crimp the edges.


Innards
1/2 lb bacon
1 onion
1/4 lb mushrooms
1 lb guyère (or 1/2 lb swiss and 1/2 lb monterey jack)
4 eggs
1 C sour cream
1 C milk
salt and pepper

(**UPDATE 3/13/2011: we used slightly less cheese and only 1/2 c milk today and our quiche was much less liquidy**)
  1. Preheat the oven at 375°.
  2. Fry the bacon.
  3. Chop the onion and sauté it in the bacon grease.
  4. Slice the mushrooms and sauté them with the onion.
  5. Mix the bacon back in and sprinkle into the pie shell.
  6. Add cheese over the bacon.
  7. Mix the eggs, milk, and sour cream together and pour into the pie shell.
  8. Add salt and pepper. The pepper dots add to the look, so put lots in.
  9. Bake until it passes the toothpick test. Let sit to set 15-30 minutes.
  10. Cut, serve, and eat.